Recent Posts
Categories
Elastic bands and sticky tape
Posted on August 19th, 2006 by James.
Categories: Pinball.
My optos haven’t arrive yet.. and yesterday I fitted my rubbers.. so today I had nothing to do.. that is except fit the two cannon actuator arms.. but they’re pretty useless without the drive plate to attach to the base of the cannon… so guess what I did today? 😉
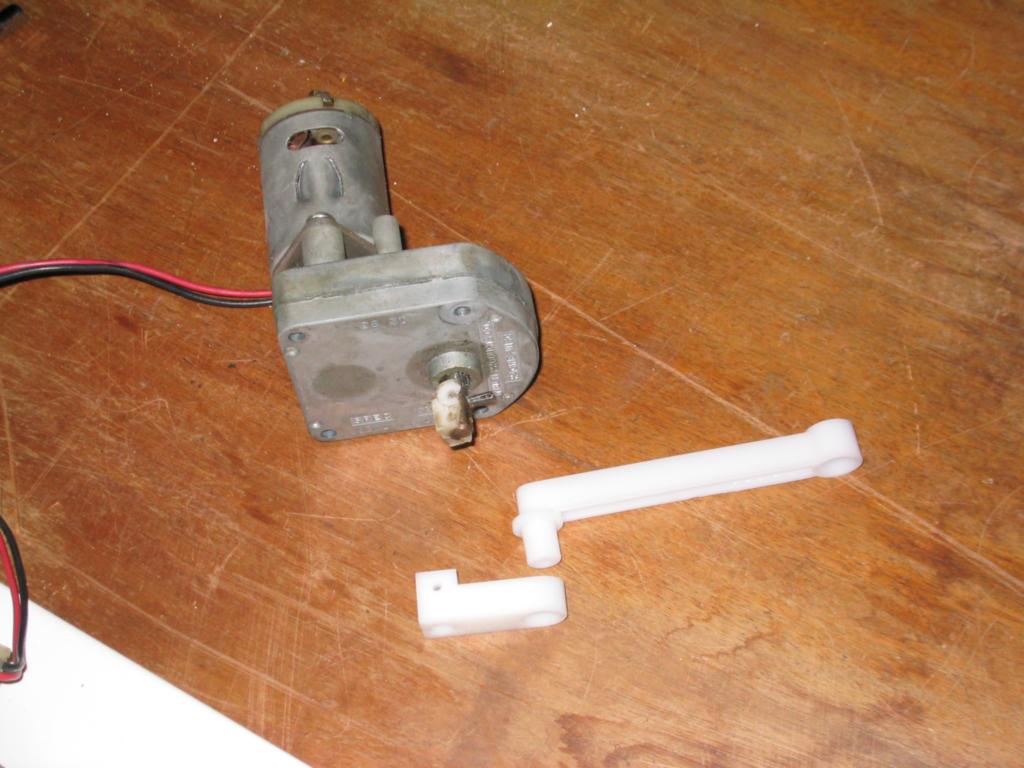
I’ve no idea how my right cannon got abused to end up like this. The small arm that connects to the gearbox must have been wrenched off. There’s still a small chunk of it left on and the split pin is still in there. I hammered out the split pin (it was stuck fast!) and fitted the new arms, with pretty much zero effort… if only I had the drive plate!!
I ordered the drive plate from illinoispinball.com last saturday. So far my order status is still “processing”. I tried calling them but there’s just a voicemail that says there is no-one to answer your call.. then it disconnects! You can’t even leave a message! and yes I’ve been trying to call them at sensible american time times. What also makes me suspicious is that my order number is 132. That doesn’t sound like a lot!
So out of frustration with illinois pinball I decided today to create my own drive plate! All be it a temporary one, while I’m waiting for the real deal to arrive.. so not a permanent solution, but they seem to be taking their jolly old time, so perhaps something that might last a month or two. To do this here were my weapons of choice:
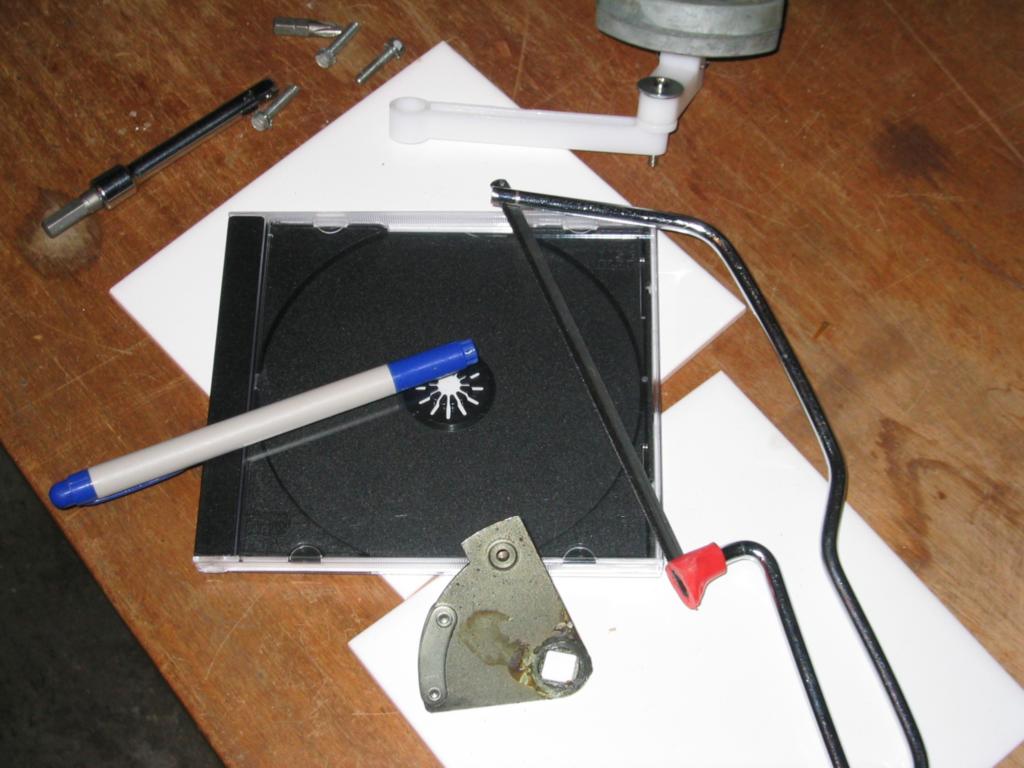
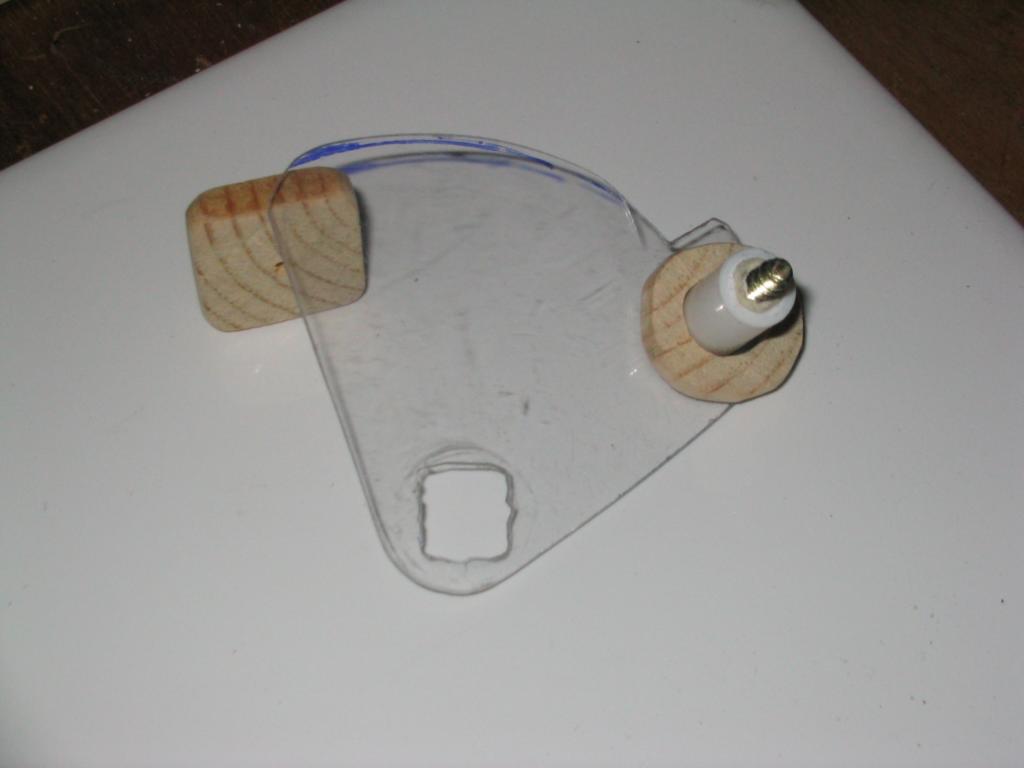
A cd case, a permanent marker and a junior hacksaw. At the bottom is the left drive plate. So I need to make a mirror copy of it. I yanked off the cd outer case and traced round the left drive plate.
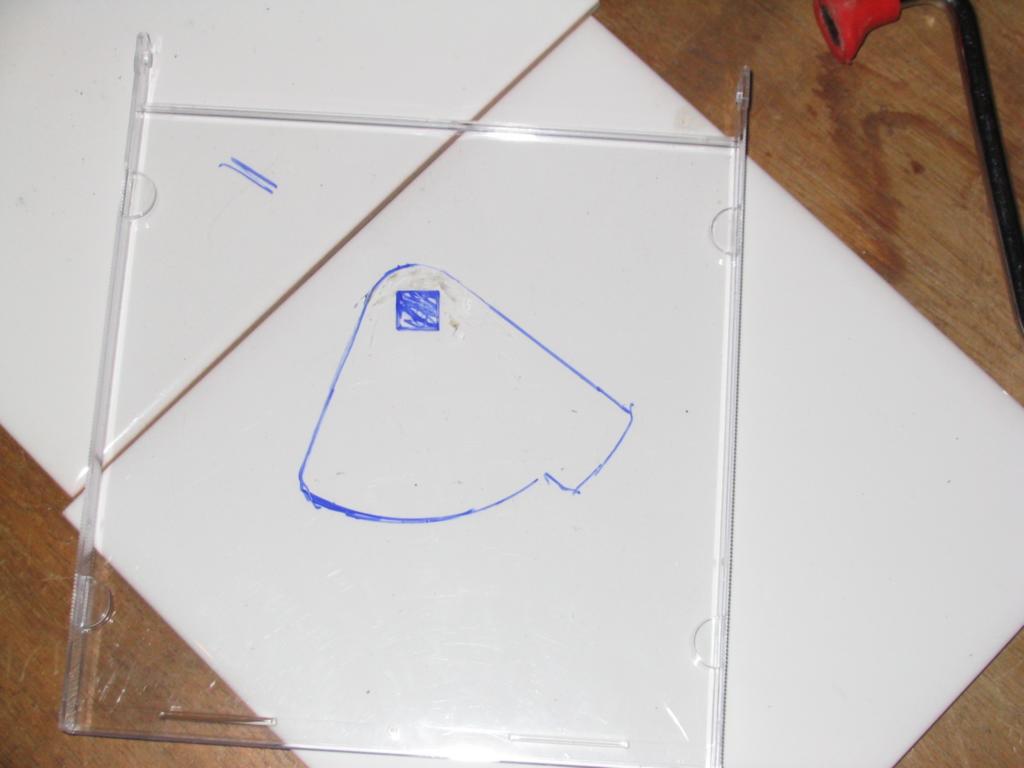
Looking pretty snazzy huh? 😉 Next I cut it out with the hacksaw. This is a LOT harder than it sounds. Because it’s plastic it’s extreamly brittle. If you saw too hard it shatters into tons of tiny bits, so you have to saw really gently. Also you can’t do curves very easily, so I just cut straight edges, then I used very fine sandpaper to make the curve and smooth off the edges left by the hacksaw. The result:
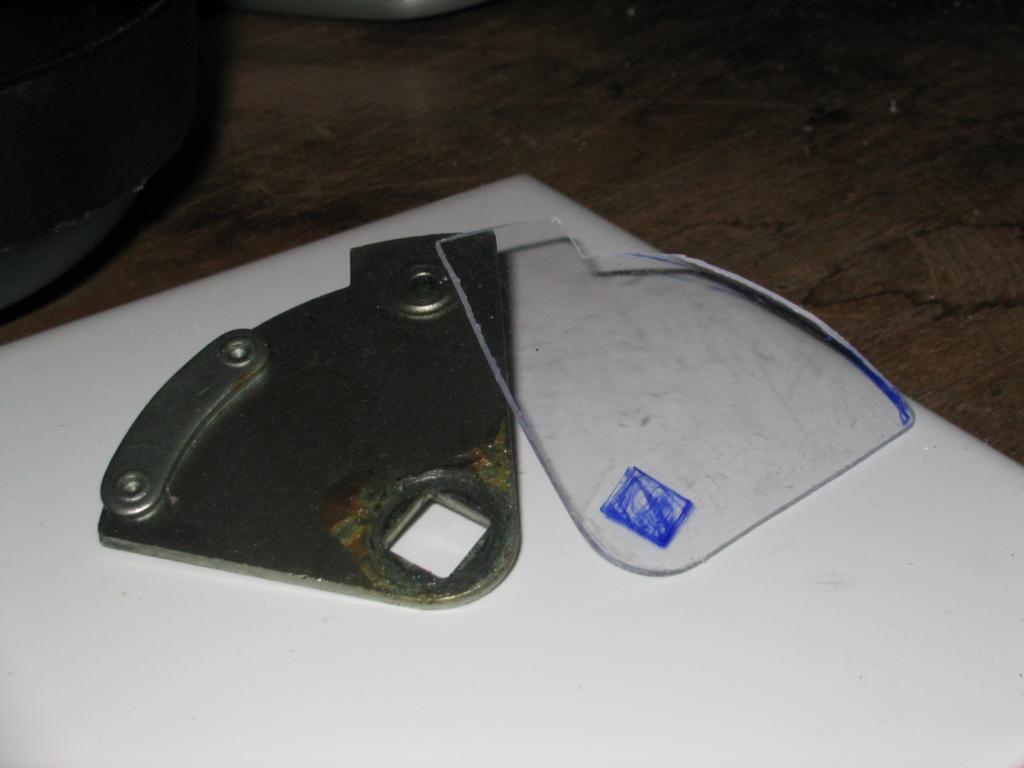
One pretty similar looking right drive plate! Cutting out the square hole was a right pain in the arse. I thought about using a stanley knife, but then I decided to drill it out. I got a block of wood to drill against and used masking tape to stick the plastic plate down, then I used my smallist drill to cut tons of tiny holes in the square. It worked pretty well. After a bit of wiggling the drill the center section fell out and I had a rough hole with lots of circle edges, so I put a tiny piece of sandpaper on a cable tie and used it to sandpaper out the square. It worked really well! As I was doing it, I was holding it up against the cannon base to see where to sand. Once I was done it was a perfect fit! 🙂
Next I had to make the post, where the cannon arm attaches. I drilled a hole for a screw to go through, then thought about what to make the post out of.. I needed small frictionless plastic tube… Then I realised that I get posted them all the time! Free charity pen! I cut a bit to the right length and put it over the screw.. it wiggled a bit too much, so I took it off and wrapped masking tape around the screw until the pen cylinder fit perfectly around it 🙂 Then finally on the original drive plate the post has a raised bit at the base, so for that I sawed off a tiny bit of wood from a stick I had lying around, drilled out the center and used a stanley knife to cut it into a rough circle. Ta Dar, the finished product! The wood square is used to go on the top of the screw to hold the cannon arm on.
Cool huh! But.. does it work?…
…..
..
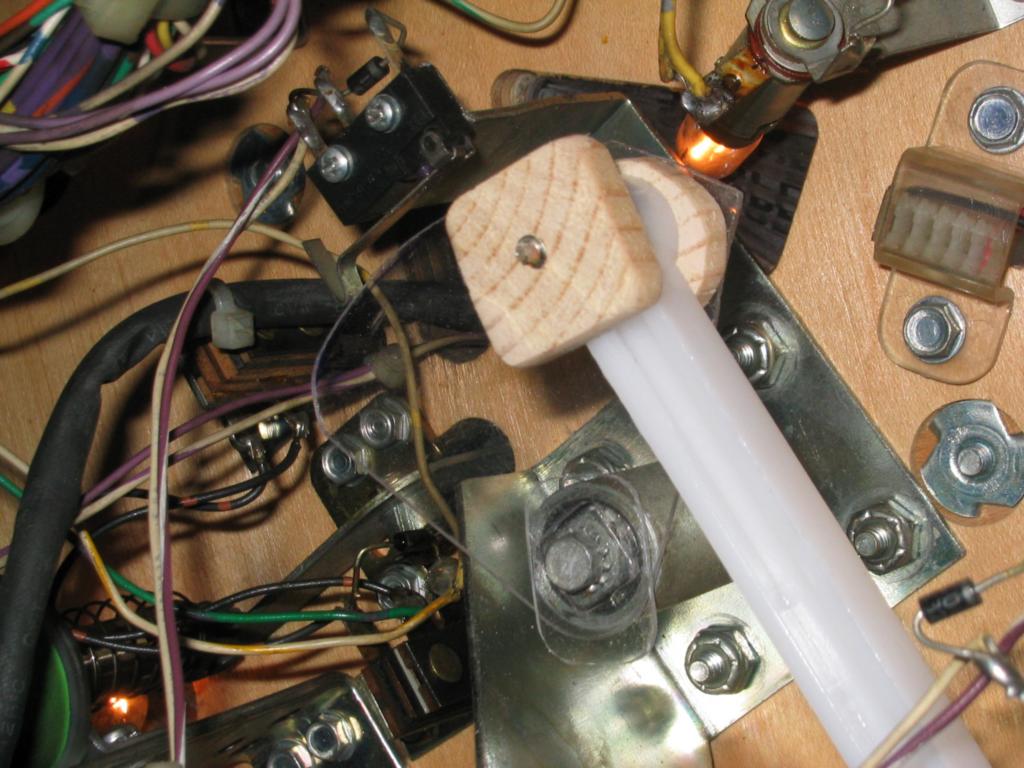
Of course it works!! It works perfectly!! 🙂 In the pic you can see it fitted and making the top switch close. Because the plastic is much much tinner than the original part I had to slightly adject the switch arm to make it rest on the plastic. Rather than bend the switch, I just unscrewed it a bit and tucked some folded paper down one side then screwed it back, so now it’s perfectly aligned for my plastic drive plate, but when the proper one arrives I can move it back with no problems 🙂
I’m so chuffed with myself for doing this! I feel like MacGyver! 😉
1 comment.
Nick
Comment on August 20th, 2006.
Yo mo, great effort on the machine. I was the guy that sold it, and it certainly was a PROJECT. Looks like you’re making progress tho, and the home-made drive-plate is pure genius!! Keep up the good work!! Nick http://www.pinfest.co.uk
Leave a comment
Comments can contain some xhtml. Names and emails are required (emails aren't displayed).